Couldn't load pickup availability
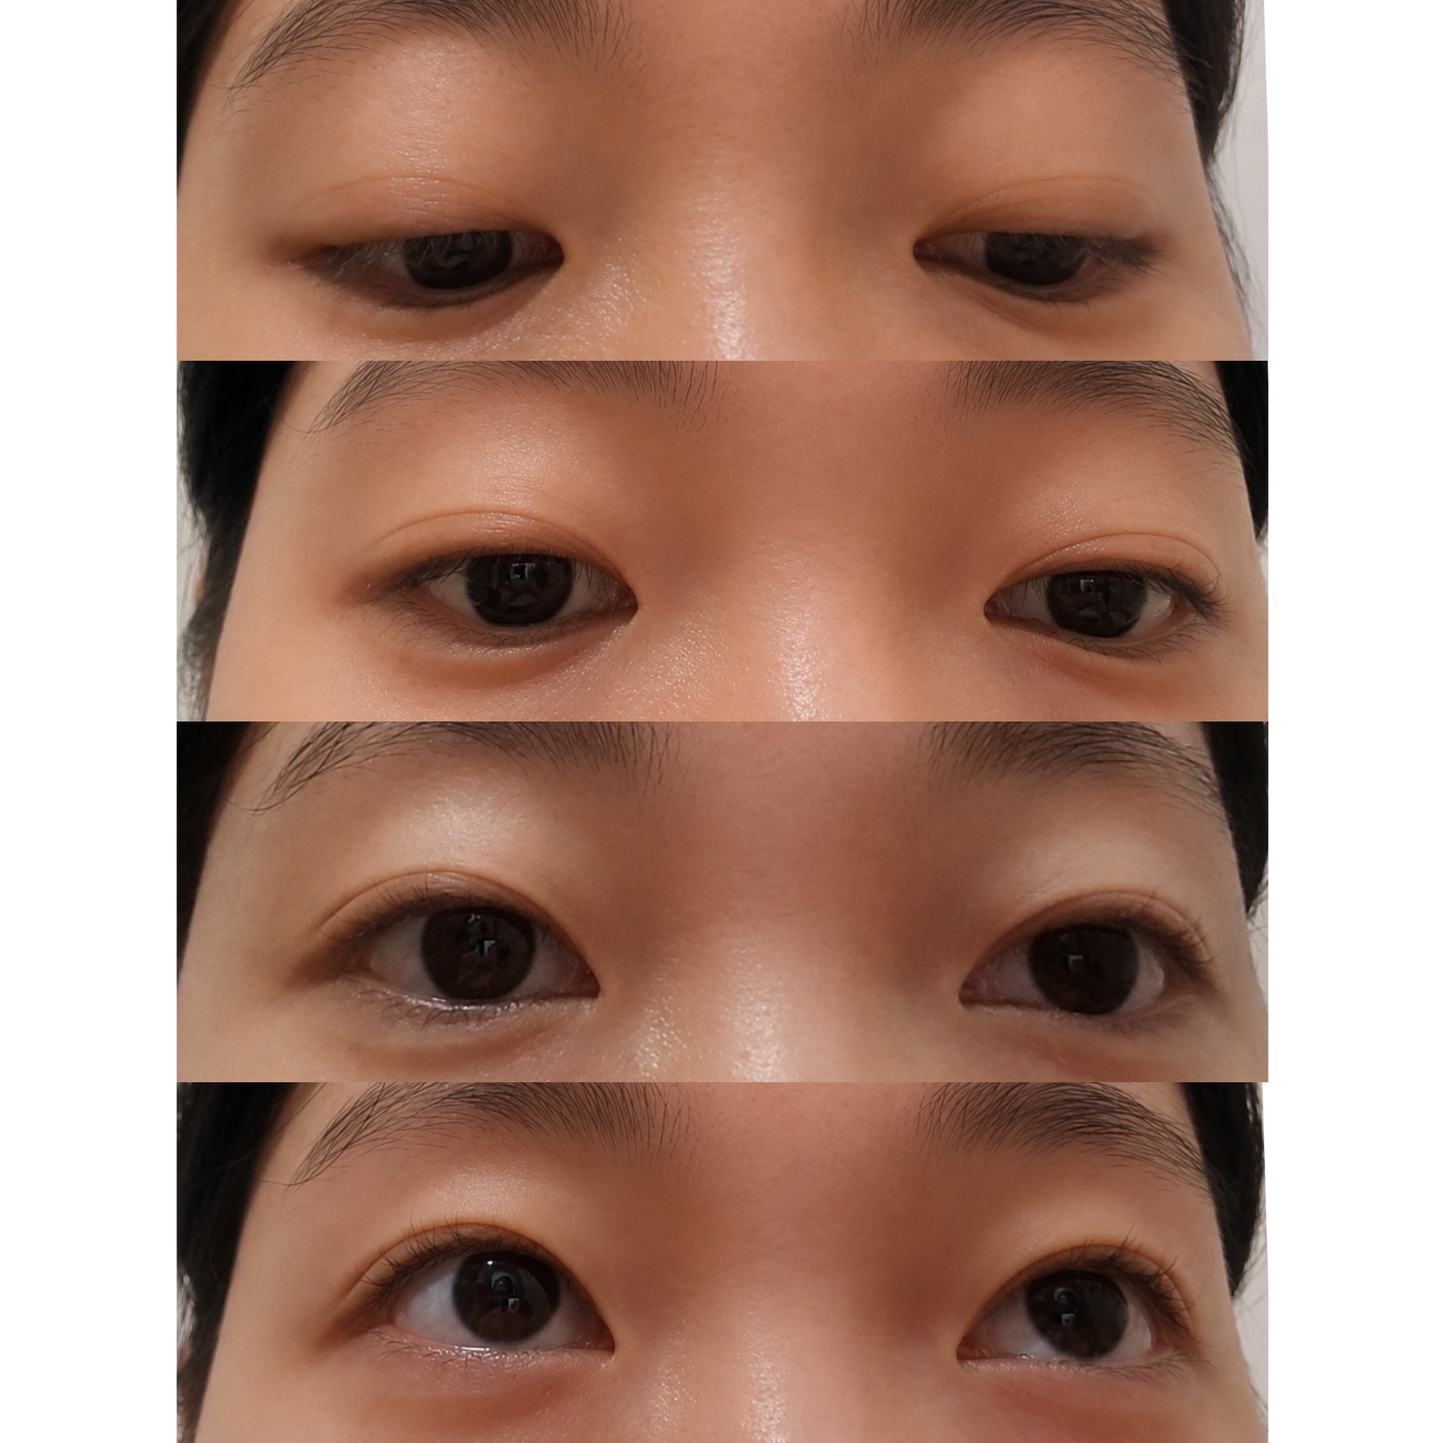
Optifold EyelidShaping™ Tapes are designed to help create a more stable double eyelid crease while you sleep, without wearing tape during the day.
How the system works
Made with medical-grade 3M adhesive: latex-free and designed for safe overnight skin contact.
4.4 / 5.0
(45) 45 total reviews